Playlist

Local Folks Foods

Excellent Kosher Food

Showing posts with label Experiment. Show all posts

January 9, 2018

Christmas Mad Mac Series: Duck Penne w/ Duck Fat Cream & 4 Cheese Sauce


Sometimes, the best meals are created by accident. Other times, it comes from necessity (which is true in this case). I had made this dish before and because of a November #FoodieChat session, this came to life once again. It all began with a question. 
Q4 What was your first home cooked meal you made, and how have you perfected it over the years?
 So the fuse was lit. And one response started it all. My reply follows. 
Replying to 
Macaroni/cheese - I use 5 different cheeses - dairy products & don't overcook the pasta. Also, I add lobster time to time.
You really want to kill the crowd, substitute lobster w/ duck.

 even added some encouragement. 

I shared why I had to substitute duck for lobster (I'm allergic). Maple Leaf Farms came to the rescue. Through a chain of events, Maple Leaf Farms provided a duck and some duck fat for me to work with. I had some fun but was unsure what angle I would take to make this happen? As I thought about this, it’s really not hard to do. For all practical purposes, use your normal, go-to mac & cheese recipe and then add duck to it. Really. It’s that simple. If you never cooked a duck before, there are a few things I suggest before doing so. First, treat it like chicken- thaw it and then rinse and pat dry (some debate doing this but I feel better doing so). Next, before you cook it, pierce or score (which is best to do) the skin of the duck on all sides. I also suggest placing a bowl underneath the duck. Commit 20-30 minutes per pound at 350 degrees F (about 175 celcius). Mine took about 4 ½ hours (it was about 5 pounds). You can see the end result below. Once it cools, shred the meat off the duck and reserve it (or in plain English, put it aside).  What you see is the result. 


Above, you see the finished duck. I used an electric roaster for a few of reasons. The main reason was it would be easier to clean. As you can see, I used a rack to cook and cool the duck. You could also use a chicken roaster (or an upright roasting rack like you see on the bottom right, 2) or a rack. Duck fat & duck meat seen below. You can see all the fat I collected (conservatively, about 3-4 cups). I chopped some onions and garlic as well since I am using the fat. As for the rack, hint hint William Sonoma!!!!


Now if the name of this blog doesn’t fit a post past, present or future, this one will do just that. I spend the following weeks deciding on the pasta and the cheese. I wanted to use a more elbow or ear/shell-shaped pasta. So I get ready to boil the pasta and thinking I had some “conchiglie” pasta (which is Italian for “shells” or “seashells”) but went into the pantry……. and NONE on hand! I hope for elbow pasta but all I had was penne. I figured it would work since that sauce hold sauce well. All you need is about 1- 1 ½ pound of your favorite pasta. Follow the instructions and once done, drain pasta water into a bowl in reserve. The starch still remains and can help thicken the sauce if needed. I like to season the pasta with salt, pepper, a little oregano, garlic (granulated or fresh works), and some red pepper flakes. You can add whatever other seasoning you desire to use.

THAT was the easy part. So I was thinking of making a white sauce (or Bechamel) similar to the once you see below (1). Pretty simple to do.
1-1/2 tbls (25 grams) of butter & flour each. Melt the butter, then add the flour until it becomes a paste. Keep the fire low to medium (cook slowly) Then once the paste is formed, add 1 ½ cups (or 300 ml) of cold milk, added in equal dosages of three.   

The problem? NO MILK!!! So the pasta water came in handy. The butter- flour mix basically became a roux. I then added sour cream & American cheese to the penne with some of the remaining pasta water on low heat. The result was the pasta water cooked down, mixed with the sour cream and the pasta water. Again, on a simmer/LOW heat. If I had the pasta on anything but a simmer, I promise it will burn. I added sour cream to the consistency I wanted (about 1/3/-1/2 cup of sour cream added and stirred frequently. Of course, I added some of the duck fat reserve (from the bowl shown about) to this as well. I used only a few spoonful’s as I went along.

So now, once I got my pasta where I wanted it (with the sour cream and pasta water), I then added the shredded cheese. So what should you use? Whatever cheese you would eat alone but if you use multiple cheeses, make sure at least one melts well. I was debating should I used a form of gouda or a goat’s milk cheese of some sort? I was in my local Mariano’s market and they had a cheese called Lamb Chopper (sheep’s milk, which was VERY smooth). They served some up to me and from that moment, I was hooked. Cheese #2 is in. I went to a local Whole Foods and they had some 12 Month Aged Manchego, which has some modest “heat” (e.g., spice) to it. But still good enough and Cheese #3 was found. I shredded both cheeses and stirred them in the penne.   

Here's the result of this adventure. My parents also enjoyed this as much as I did. I can tell you this with no hesitation. This dish was MUCH better the next day, which happened to be Christmas day. As you can see, this penne was a nice compliment to the rest of an already heavy meal. What could I have done to top this? I think some vegetables, like mushroom, peas, tomato, roasted or grilled bell peppers may have added a different dimension to this dish. Still, I'm please with how it came out. 

So what began with a vision, fell into borderline megadeth panic, only to save the day with victory. As I already said, you can basically take your own favorite macaroni and cheese recipe or whatever you make lobster mac and cheese with and add duck. This is a win for someone like me, who is allergic to fish and seafood. I was six when I found out I was allergic after eating red snapper, which led to a FULL prophylaxis attack (the only serious one I had). entire  You'll be amazed what you might create when part of the food chain is excluded from your diet. I can't really miss what I could never eat to begin with. So if I didn't have allergy, I may never have thought to create this dish. There's a trade off for everything. 


And in case you doubt me, it also travels well for lunch. Both dishes you see here have trace of duck fat. In the case of the non duck penne, I added some of the duck fat when I heated it up. Yes, it worked like a charm!!!! The post-Christmas penne with the Christmas Eve meat pasta. I wish lunches were always this good.. Step out and experiment. That's where all the fun is found!!! Again, THANK YOU AGAIN to the good people Maple Leaf Farms for their help with this project. They asked how they could be of help and they were. They can be found here: https://twitter.com/MapleLeafFarms  and  http://www.mapleleaffarms.com.

Last thing. This is only the START of sorts. A new start and life this blog in 2018 (which I hope to post at least 3-5 time in a month about something). The start of an old food experiment of mine (Mad Mac Experiment) as well as at least one new one (Fabulous Fat or Eat Wilder). And guess what? There are MORE things I did with this duck fat I will share soon. 


Works Cited: 
1. Gordon Ramsay- “How to make a classic white sauce with cheese” video. Gordon Ramsay YouTube Channel: https://www.youtube.com/watch?v=iOPb95Wo3H4            
2. Vertical chicken rack photo taken from William Sonoma’s Internet site (https://www.williams-sonoma.com/products/the-ultimate-chicken-roaster/).  


September 5, 2017

Muffa-burger, Part One: Burger Beast Experiment

So here's a new, on-going experiment. Burger Beasts!!! I have various condiments at home. Labor Day had plenty of BBQ (thanks, Dad)!!! This idea came into my head a few month back. What did I do? I took a burger and kicked it up a bit. You want some flavor and desire to try something different, you may consider trying what I'm about to share.


Now what you see is a bottle. This product was the inspiration for this project. I had some of Marconi Food's Muffuletta Mix (1) for some time but never had a chance to really use it. One of the most popular sandwiches in NoLa is the muffuletta. New Orleans has a wide variety of people and culture mixing together in one big symphony. While many know about the Creoles and the Cajuns (those who migrated from French Acadia after not signing allegiance to Great Britain.  While many know of the French influences of New Orleans, there are others nationalities that are pretty well represented are well. The muffuletta sandwich was born in this city sometime around 1906 by Salvatore Lupo, owner of Central Grocery company. You can see the obvious Italian influence in the type of bread (Sicilian round bread but focaccia or the like is seen more today), Italian meats and cheeses. It also has a sauce. To me, the muffuletta olive sauce is like giardineria (celery, cauliflower, carrots), only a bit more olive and carrot intensive.


So what did I do? I took some of the hamburger Dad did on the grill, melted some cheese and then added some of this sauce. The result was a very different take on a burger. I was quite pleased!!! I called this part one because I want to take it further. I will post some of my "experiments" I have done over the last year. For those who follow me on my InstaGram account                                       (https://www.instagram.com/emptyplateadv/) or Twitter (@emptyplateadv), you may have seen some of the crazy things (at least I'll concede as unusual) that I have posted there. There are no style points for this picture so let it speak for itself. Make sure that the mix is cold. It will provide a nice contrast to the hot burger and cheese (the same way as a pickle or raw onion). I'm going to take this further soon but for now, this will have to do. Step out of your comfort zone. Try something new. I liked this very much and think may of you will as well.  Enjoy!!!


Gut essen..... mangia bene...... comer bien!!!!!! It was nice to FINALLY get something back in writing and hope to do more as time permits. If you're not familiar with Marconi Foods, give them a chance. They a great product line and I doubt you'll be disappointed!!! If you're bored, tell them the Empty Plate Adventures sent you. No deals as of yet.


Worked Cited/Reference:

1. Photo taken from the Marconi Foods Internet site at https://marconi-foods.com/


February 11, 2015

Prime Time: A Prime Rib Birthday Dinner


Prime rib!!!! This was part of the dinner my Dad and I served my Mom last week. As is customary in my family, you get what you want for your birthday. Mom chose lobster and since I can't eat seafood, she decided to have us make a Prime Rib for the rest of the meal. She actually found the roast at a very good price!! That helps a great deal.  On this post, it will be brief but to the point. The cut we used was graded prime. I hope to get a cut of meat like this during the summer. Imagine this coming off the grill!!! Yep, I thought so.


As you can see with the first two pictures, there is a prod connected to the roast itself. That actually connects to the over. THIS is the say to do a roast. This provides a nice way to eliminate any error in cooking. Mom actually started this. What was done is simple. Take the prod and connect it inside its slot into the oven. Then set the desired temperatures you wish to cook the meat and where you want the meat to be at. In this case, it was cooked at 375 degrees for about 2-2 1/2 hours. My parents prefer more towards medium, so the targeted meat temperature was 130 degrees. The roast itself was about 6 pounds (pre-cooking weight). If you're considering getting a new over, the ones with a prod thermometer feature is amazing. Once the desired internal meat temperature is reached, the over shuts off. The meat rested for about 30 minutes, covered in foil. Which leads me to the next part of this dinner. A pretty cleaver idea came to my head and it worked like a charm. 


Now this is what you may call the "educational part" of this post. Since I live in the midwest, it's pretty obvious that I won't get getting the farm fresh foods anytime soon. It's too cold to really grow
anything. The interesting thing is where much of our fruit comes from (in particular, where I live and during this time of year. 


As you can see from the top picture, we get a lot of fruit and vegetables from South America, namely Peru and Chile. That's a good thing in my book. We get the food we need, it's normally fresh, and some farmer in another country can male a decent living, selling fruits to places like where I live. I don't ever take being able to get decent asparagus at this time of year. I normally drift towards white asparagus since they're a bit sweeter (to my taste anyway) than it's other counterparts.

Now this is the new trick I tried to keep them asparagus warm. This is something I had not considered doing until I finished cooking these asparagus. I cooked them as I normally did (water and finishing with olive oil for about 5 minutes each). I would boil the water first, cook the asparagus in the water for about 5 minutes then add some olive oil to finish cooking them (3 to 5 minutes, to the point where they're soft but not soggy). I finished them as I normally do, seasoning with salt an pepper. Now the fun part. As you can see from the smaller picture, I pulled out the foil. Once I finished cooking the asparagus, I them cooled down the skillet I cooked them in, wrapped them in foil and that was it. I tried it on a hunch and it worked well. They stayed warm for the 25 minutes it took to cook the lobster.


As you can see, the above is the finished product.I have some of the asparagus break on me during my prep time. So those went to me. I ate them. So it doesn't exactly look pretty but it did taste very good!! I was very happy with how the meal turned out. Mom had one of the smaller pieces. This was the biggest piece, which since I'm a fairly big guy, it went to me. Dad has a piece a little smaller than this one. I'm not getting into the potatoes since they're so simple to do. Now imagine going to a fine steakhouse and getting a cut like this and a lobster tail (for Mom). Price tag is shell shocking. 


Another look at the "Diamond John" Cut. I'm guessing this piece is between 20-25 oz and since my piece was in the middle of the roast, mine was closer to medium rare (just as I like it). Sure, it's great to have a great meal like this but there is something greater at play here. I have several friends who have buried at least 1 parent. My Grandmother (Mom's mom) died earlier this year at age 96. Both of my parents are still alive and very well. I know that I can't spend as much time with them as I would like. If you get nothing more from this post, take this with you. You have loved ones who are still in your life, enjoy time with them every chance you get! This dinner was so much fun and every time there's a special occasion like a birthday, I want to make sure I can be there to enjoy with my parents. They're the only ones I have and quite frankly, I would not want anyone else. I am VERY thankful for my parents. I'm lucky to have them. Finding a good rib roast at a great price, great. Getting the meal, fit for royalty at home, even better. Enjoying a meal like that with great parents like mine. Priceless!!!


January 11, 2015

The Mad Mac Experiment, Part 1: An Ad Lib Macaroni & Cheese

Look at the name of this blog. If any post might sum the title up, it might be this one. Looking at the title, you'll see macaroni and cheese as the subtitle. How can this subject become an adventure? Well, the main title is the subject for a year long journey into this very subject. Macaroni and cheese is a great dish (this straight from the Duh Files) but as I talk to people, I am a bit amazed how limited some people have gone with this. I call this The Mad Mac Series because my goal is to take this as far as I can. Use your imagination. Don't be limited to what you've seen and what you're "supposed to do" based on what you see others doing. You are about to witness a home cook flying by the seat of his pants. Sit tight.  I was inspired by Pinterest to do this series. I have a board named "Mad Mac" and it's exactly what the name implies (1). At last count, that particular board has 419 pins to date and I do intend on adding more. So here's where it all begins. 
This is conchiglie, boilded and placed in a plastic bowl. I would mix in some pasta water I reserved so it wouldn't get too tight or worse yet, turn into a glob. 

So I get home a couple nights ago and wanted to make some mac and cheese. Sounds simple right? Well as the moments ahead unfolded, it didn't exactly go as I had hoped. As you can see, I choose yo use conchiglie (seen above, pronounced con-KEEL-yay) as the main pasta this time around. I figured this would be a good one to use since it will hold cheese and the sauce quite well. The Italian meaning for this pasta, when translated, is seashell. The root word comes from the Greek root word Konkhe, meaning shell and the Latin Concha, meaning shellfish (2). That's what the pasta is shaped like (many Italian pastas get their names from body parts, shells or something similar). 

I will address that in this series as well. I decided not to use elbow since I wanted a pasta that would hold a sauce nicely. That's why I selected conchiglie instead. Now back to the pasta itself. I cooked it for about 10 minutes, drained and save the some of the pasta water. The water would eventually be the hero of this dish. NEVER dump your pasta water entirely. You just never know when you may need it. After I boiled, this is where the adventure begins. One of the rules I live by is never lose all of your pasta water. It has a natural starch from the pasta. It also works well to loosen pasta (should you store it like I did here) or in a sauce (which you will soon find out). After I boiled the pasta, I stored in in the bowl you see behind the water. I seasoned the pasta with salt, pepper, and a little Mexican oregano (mixed with a little pasta water).

The pasta water came in handy in more ways than one. Remember how I mentioned the adventures in this post? It's about to start now. As for making a simple roux and sauce, well, I had to ad lib a bit (hence why "ad lib" is in the title). You might even think I'm making this up. I'm not. 


 So I begin to make a roux. I broke the rule a bit (as I do so well). One part olive oil (extra virgin, of course) and on tablespoon of butter. I melted them both down and then added the flour (a tablespoon at at time, so totally about 3 1./2 tablespoons). As you can see on the left, you can see the olive oil and butter mixture come together. On the right, you can see where I began to work the flour into the oil mixture. I kept the fire steady but not too high, for fear of burning the oil or the flour (or goodness forbid, both). So I'm feeling good. I'm expecting to make something fantastic. Then I go to the fridge for the milk. The milk I had on hand was 2%, not my preferred whole or heavy cream. So I used about just under a cup and mixed it in slowly. The paste from the roux began to loosen up. I realized that I didn't have that much milk left and realize it was getting a bit too tight. I had planned on adding sour cream as well. The only problem was that it had gone bad (almost taking a life form of its own). So I added the pasta water, spoonful's at a time where it won't get too tight. It didn't. In fact, it began to loose where I wanted it. If you look below, this is what the result was. I then added one egg along with it. I was pleased how it turned out. 


I cooked the sauce a little bit. You might notice the change in color. This is where I seasoned the sauce. I added some salt and pepper to start. Then I added some Spanish paprika and cayenne. Then stirred it until it properly mixed together. I also added some Mexican oregano, onion powder as well as granulated garlic (I had none of the latter two fresh). Now do you see how this is turning into an adventure of sorts? I normally have these things on hand but for whatever reason, I did not this time around. Not to mention the canned tomatoes and peppers that had also gone bad on me (I forgot I had those on hand, the went bad in December, 2013). Even after all of that, look below and see what the result was. As I stirred, I did add a little pasta water just to loosen it up a bit more. This entire process, due to the level of heat I used, took about 15-20 minutes. 


Then I added the cheese. I had some shredded cheddar and a couple other block cheese on hand. So I cut them up and the result is below. I stirred until the cheese had fully incorporated with the sauce (about 5-10 minutes). Just before this, I decided to add about 2 tablespoons of Miracle Whip (OK, it's my guilty pleasure and I like the taste). 


Above is the just before all the cheese melted fully. As you can see below, I became to fold the conchiglie pasta in with the sauce (slowly but surely). I didn't add it all at once but only mixed in about 1/3 of the pasta at a time. 


Below is the finished product. Since I seasoned as much as I did, I really didn't need to season any further. I let it rest for about 5 minutes before I ate it. I didn't eat much of it (since I made it as late as I did) but did give it a taste. All things considered, I'm pleased how it turned out for me. 


Even with all the mess with the ingredients (or lack thereof), it still came out well. This ends the first of many in my soon to be "legendary" (or at least hope it will gain cult status at the least), "The Mac Mac Series" blog posts. I'm not sure how often I'll do this but in a perfect world, I'll do at least 2 postings on this each month. If I can do more, fine. This isn't going to be some redo of various recipes alone. My intention is to try and think outside the box some. Go where some would never consider going. I was so excited to do this, I decided to start now. I can't recall when I did two posts in one day (ever). I guess there is a first time for everything. 


A final tip of the hat to today's hero, the pasta water. Thanks to the water, I managed to keep my pasta and the sauce loose. Below is my lunch (e.g., the finished product). The mac and cheese with some chicken and greens soup. I can't wait to do the next posting. I must admit, this posting was done almost ad lib since I really didn't prepare. I look forward to showing what you can do with macaroni. This is an adventure I really look forward to taking this year. I do have several ideas. Some may be fancier than others. Hopefully, you'll enjoy reading this series as much as I like doing these posts. I look forward to showing you what I considered doing with macaroni. You will see me make dishes that are not only hot but cold. In addition, I may marry the mac and cheese with something you might least expect. The journey has only begun!!!


1. Empty Plate Adventures "Mac Mac" Pin Board http://www.pinterest.com/emptyplateadv/mad-mac/

2. Definition taken from Online Etymology Dictionary,  http://www.etymonline.com/index.php?term=conch

April 7, 2014

The Stock Experiment


(1)
                                 So I was on a chat session a while back and a couple subjects came up. Actually, it was somewhat a debate. The thought was the use of crock pots/slow cookers and how someone would use them. The discussion was fun but civil. As it relates to the use of a slow cooker, I'm pretty neutral as I think about it. It depends on how much time I have and what I'm making. You might be curious of how the discussion went? Well, it went like this. The question was about the use of a slow cooker and how do you use them. Well. As you can see below, the responses were pretty spirited. Please notice the comment I placed in "italics" to set the table for what I'm writing about.
                                     So this is how it went down in a nutshell. There was more so if you're curious, use the #FNIChat and go to the date of the discussion. So being somewhat the outside thinker, I decided to try something different. Someone did mention using the slow cooker for making stock. I bought a whole rotisserie chicken from a local store. As I drove home, it dawned in me. What would I do with the carcass once I ate the chicken. Then decided to embrace a "Mind of a Chef" moment (or my version of it anyway). What if I decided to make a stock from my slow cooker? That's what I did and there were some pluses and minuses but neither were too difficult to overcome. As I said before, things on this blog do not always look pretty but it will taste good.


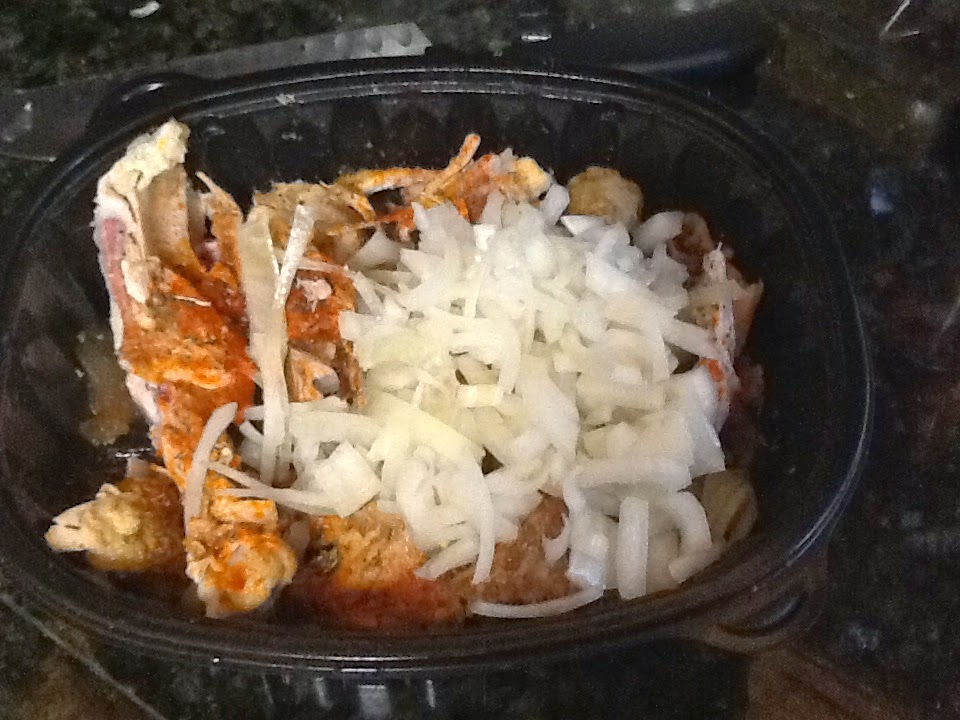
This is what I did first. I deboned the chicken (which you can see on the right) and separated the meat from the bones). You may not see this, but I did leave some meat on the bones (not very much but enough).  Then I took the remaining chicken meat and put it in the fridge. That was the easy part. 


Now before I put the chicken away, I decided to mix some tomato salsa and sun dried tomatoes for some extra flavor. 


Here's what remains of the carcass. Before I put the bones in the slow cooker, I decided to season the bones before I put them in the slow cooker. I covered the bones with grape seed oil (since I didn't have either olive or avocado oil). I used the basics (salt, pepper, and garlic powder since I had not fresh on hand) as well as 1/2 a yellow onion, Hungarian Hot Paprika (since I'm the only one eating this), peppercorns, and crushed bay leaves. I felt that would make a nice mix and figured than some of that flavor would stick to the bones and meat. 

This is the mix I mentioned just before adding to the slow cooker. 
What you see below is the result. I left this cook for 12 hours on low temperature (since I knew I was going to be gone all day). The result was pretty intense but good. That is what I went for. It took about 45 minutes to fully cool down. I took a strainer and took out most of the excess onion and all the bones. This stock was intense enough to the point where I could dilute it with some water and still be edible. I used probably 1 quart or so


I will revisit this stock within the next week or two. What I found out caught my attention. One of the pluses of this is that if you don't have time to sit in front of a pot, this could be a solid way out. As a whole, I'm very pleased with how this turned out. In other words, put on and forget it. While you do what you need to do, this stock can cook and will be ready when you get home. VERY convenient as I see it. Now the minus side. The biggest one is seasoning. Some debate one way or the other but most people I know season their stock as they go. In this case, I couldn't. I found myself seasoning this as it began to cool down. I did wait about 15 minutes before turning the cooker off but did begin to season the stock at that time. It took about 45 minutes for me to season it to my liking. It took about that long to cool down as well. In other words, the seasoning could be tricky to get right if you're in a hurry. If you wanted to thicken the stock, that could a trick especially with that much water (about 3 quarts). So if you want something thicker, you'll definitely want to do that in the early stages while the water is still cold. Or at the very least, consider that. You also must remember what you put in the stock (e.g., peppercorns in this case). I may also add the salsa after the stock has cooled down or at least more of it than I used. I did strain and put away the remaining stock (about a quart). 

So sure, I get it. It's cheating a bit. Not the pure "foodie" play. Let the cooker do the work for you.What can I do with a slow cooker that you can't do with a normal pot? Very little at face level but there's more than meets the eye. Drop it and forget it. If you're not home for long periods but need to eat, what are you going to do? Take out not only gets expensive but gets as played out as a Spice Girls song. I don't want to be rude, but I'm going to use what's at my disposal when it comes to cooking. This is especially true if you live alone. Would I PREFER to use s stove top? Absolutely. Sometimes, that isn't possible and the slow cooker is just one avenue to achieve a good meal. I won't say sorry for that. For a first time experiment, I think this turned out well. Soon, you'll see what I did with the remaining stock. I have a few ideas but need to give this more though. Now when you can say you've stood over a BBQ grill (charcoal) for over 6 hours, call me. I think that alone give me the right to cheat just a little bit.
   
   Work Cited:
1. Picture taken from: http://lumdimsum.com/2009/12/14/soup-nazi-herbal-cafe/